Centering the beam is one of the most important and frequent operations to be performed before using a laser cutting machine. This operation is sometimes mistakenly referred to as “centering the nozzle.” However, the adjustments affect the position of the optics and therefore it is the axis of the light beam that moves, not the nozzle.
To perform this operation, we need a few simple tools: transparent adhesive tape, Allen keys and, if necessary, an ink pad of the type used for traditional non-self-inking stamps.

First, set the laser power to about 15%, the focus to 0 mm, and the pulse duration to about 20 ms. Mount a nozzle with a diameter of 1.5-1.6 mm, either single or double chamber.

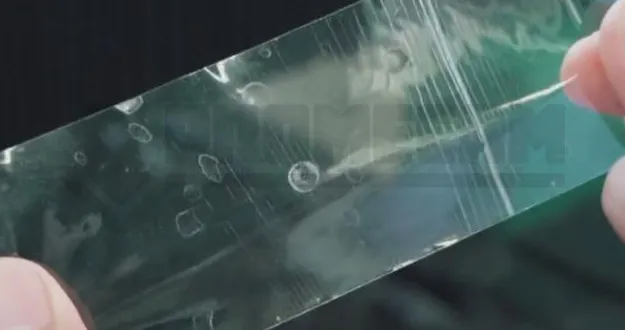
Apply the transparent adhesive tape to the tip, close the laser doors, and press the “Burst” button on the CNC.

The laser will emit a short pulse, which will result in a small hole with a diameter of about 1-2 tenths of a mm in the tape. Remove the tape, being careful not to rotate it relative to the head. Check that this hole is perfectly concentric with the mark left by the nozzle.

If the mark is not clearly visible, we can mark the nozzle by pressing an ink pad of the type used for stamps against it. This will make the mark on the tape slightly colored and more recognizable. It may be useful to frame the tape with your cell phone camera, using the “macro” setting to enlarge the image.
If the hole is not perfectly centered, you will need to adjust the head adjustment screws. Regardless of the model and manufacturer, these screws usually do not move the lens orthogonally but diagonally

Therefore, if we need to move the axis left-right or forward-backward, we will need to adjust both screws simultaneously. It is important to proceed in small steps, turning the screws one-eighth of a turn at a time or even less.


Once the screws have been turned, repeat the laser test to check the correct position of the beam. Repeat the operation if necessary until the hole is perfectly centered in the nozzle imprint.


