Have you found a photo you like and want to turn it into a sheet metal object? In this tutorial you will discover how to do this for free using GIMP (for photo editing) and Inkscape (for vector graphics).
We are often asked by customers to make gates or sheet metal with specific laser or plasma cut shapes or designs. Other times, to make a gift or a sign, we want to turn a photo into a sheet metal with a particular silhouette. To do this, we need to convert a JPG file into DXF format, which is compatible with sheet metal cutting machines. Let’s find out how to do this with simple and free tools.
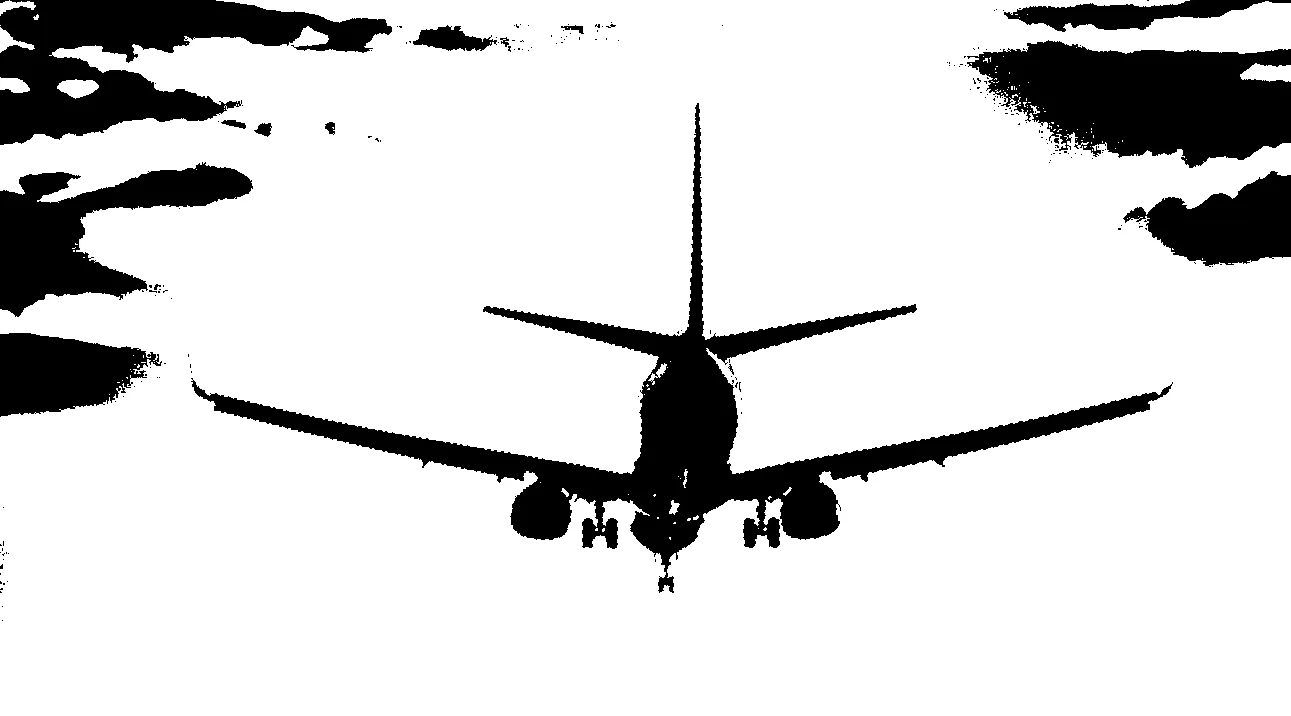
First of all, we need to start with an image with a well-defined subject, without shadows or shading, and with a minimum of contrast to the background. Let us take an image of an aeroplane as an example: it is sharp, separated from the background and free of shadows.
In this guide we will use two free programmes: GIMP and Inkscape. They can almost completely replace their much more expensive counterparts Adobe Photoshop and Adobe Illustrator. The tools and procedures are similar for both software.

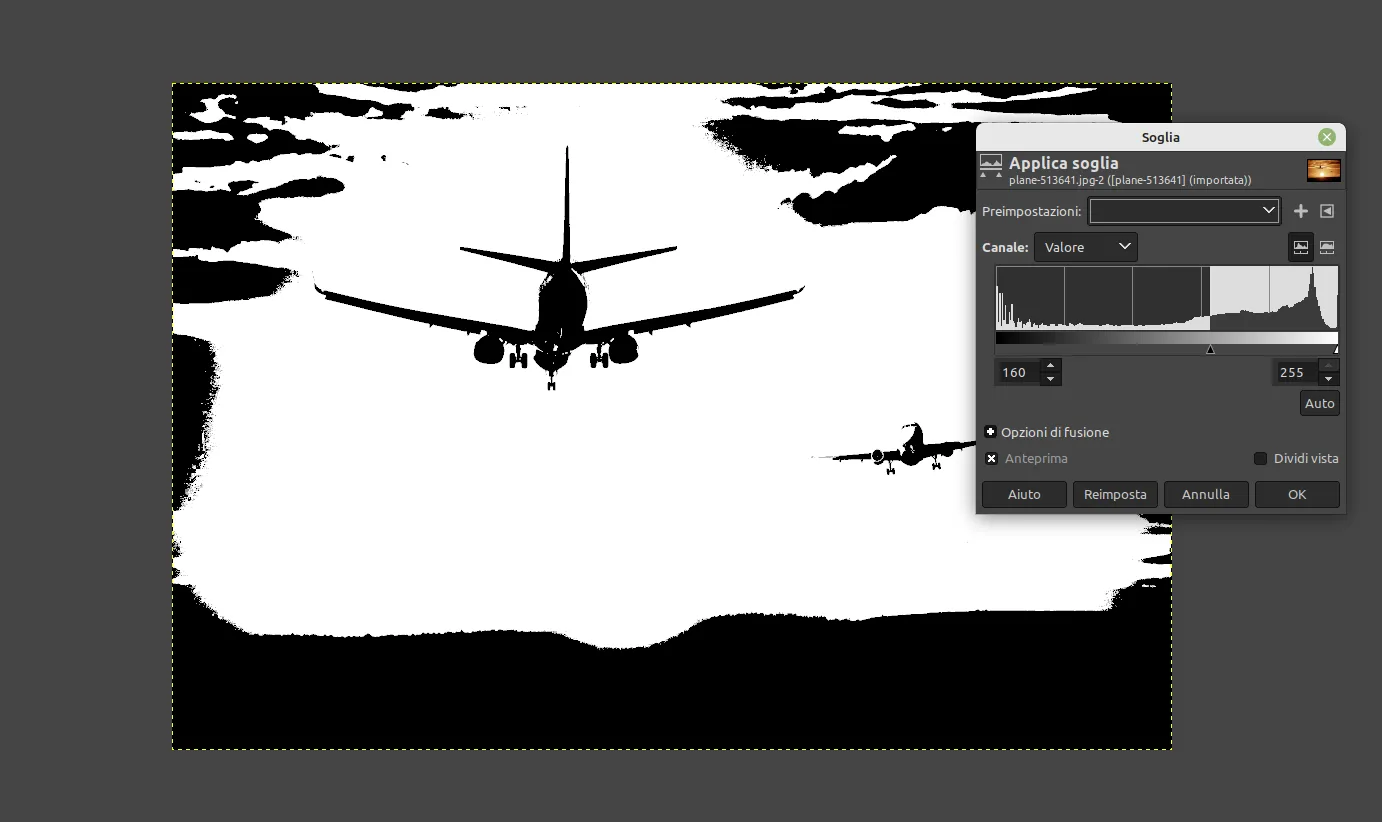
Open the image with GIMP. It is preferable for the subject to be darker than the background. If not, we use the Invert function from the Colours menu. Next, we transform the photograph into a two-colour image with the Threshold tool, also in the Colours menu. We move the slider until we obtain the best possible result. Now we use the Fuzzy Selection tool (magic wand) to automatically select a part of the image according to colour.
Click on the plane to select it automatically. If the subject consists of separate parts, we can add them by clicking while holding down the Shift key. If we do not need to save the changes made to the image, we can simply press Ctrl+C to copy our subject, and paste it into a new Inkscape document. In this case, skip directly to step 2.
We delete the rest of the photo with Select > Invert and press the Delete key. Only our aircraft on a white background will remain. We save the photo in PNG format from the File > Export menu, avoiding the JPG format which can cause problems in later stages.
If the subject is not sufficiently isolated, we will have to crop it by hand with the Freehand Selection tool. We click around the subject until the selection perimeter is closed. We reverse the selection and delete the rest of the image. We bring the selection to a pure black with the Threshold tool and export the image to PNG.
For subjects composed of several separate parts, we can use the Eraser tool to ‘separate’ the subject from the background. We set the Eraser with a small area, disable the gradients and pressure dynamics for a sharp and defined erasure. We proceed as described for all edges and then quickly erase the rest of the image by increasing the touch area. We can also select the various subjects with Fuzzy Selection and the Shift key, reverse the selection and erase the rest of the image. We perform the usual Threshold and Export operation and proceed to the next step.
It is time to use Inkscape. We start the programme, which will show an empty document. If you copied the selection in GIMP, now it is time to paste the part of the image we selected by doing Ctrl+V. If you saved the file in GIMP, import the PNG document from the File > Import menu. In both cases, the image is still in raster format, so we have to transform it into a vector layout. The advantage of vector images over bitmaps is that we can enlarge them without loss of quality and their weight is usually less.
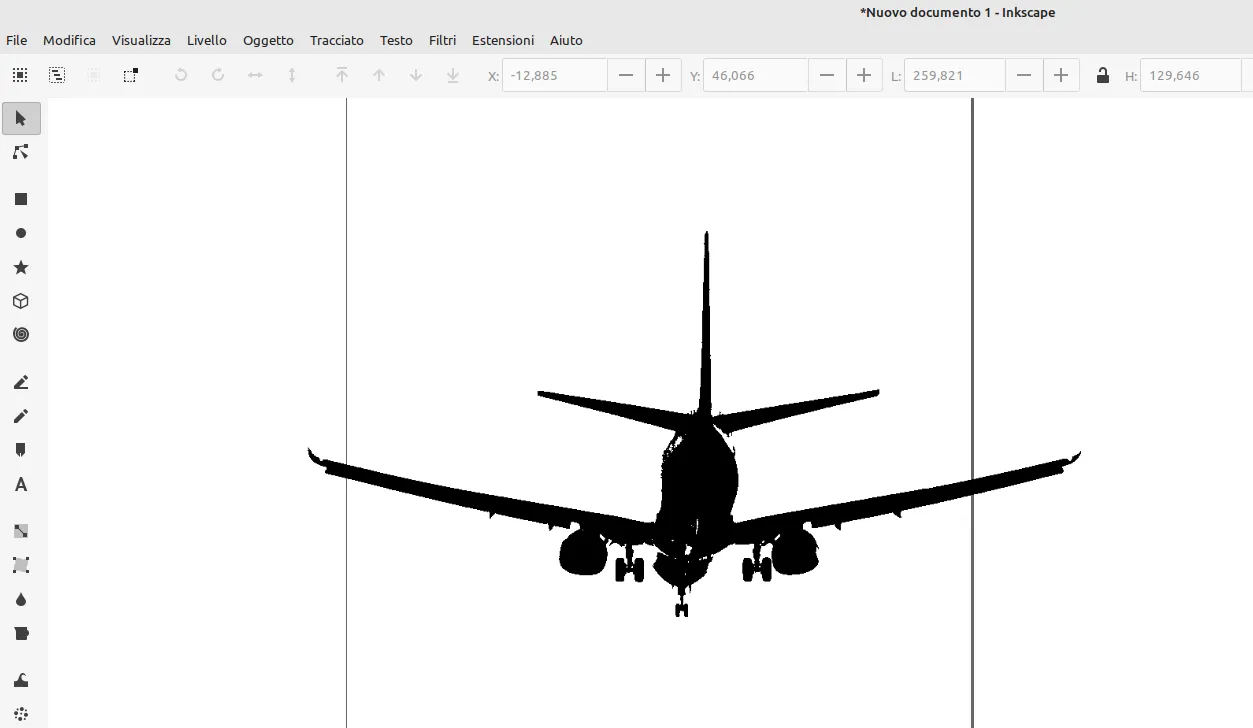
To transform the photo into a path, select it and go to Path > Vector bitmap. The default settings are usually sufficient, as we have already turned the photo into a black and white image. In the Options section, the function Smoothen corners can be useful to make the edges less sharp.

Click OK to launch the conversion. You will find a silhouette with smooth, sharp contours. If you do not see it, it is because it is positioned exactly above the starting image: click on it to select it and drag it to move it away. If the path has been generated correctly, we can delete the initial image. We select the path and lock the height/width ratio to avoid deformations. We select the unit of measurement mm and, if necessary, bring the image to the required size. With the ‘Fill and Outline’ function we set ‘no fill’ and the outline to black.

We will almost certainly need to edit the path to clean it of unnecessary details or other visual artefacts. We can use the Edit Path tool (the second toolbar button on the left) and drag or delete the nodes that make up the figure. Once the changes are complete, we export the file to DXF from the File > Save As menu, selecting the Desktop Cutting Plotter format.
Of course, there are many other functions for working with vector images. Inkscape is a complete and powerful programme for creating drawings from scratch or editing existing files. This pair of programmes allows maximum control over file conversion and editing in just a few steps, resulting in DXF files ready for laser cutting from non-ideal images. There are also online services that transform a photo into a vector file, but the results can be very disappointing. There are often restrictions on the amount of raster images that can be converted to DXF.

